Hey girls!
Today i'll be doing a post on my Bare Minerals get started kit! I received this package a few weeks ago and to be totally honest I just can't get my hands off it. I love Bare Minerals make-up! It's a miracle how the minerals can cover up your skin perfectly without even making it look like you have make up on! Bare Minerals gives you a natural but yet model like makeup look!
.jpeg) |
| BareMinerals Starter Kit (Light) |
The following pictures will demonstrate how to apply the makeup properly and perfectly. This will be the proper and professional way to apply your Bare Minerals makeup in three easy steps: swirl, tap, buff!
One major important fact: LESS IS MORE! You only need a little amount of powder for full coverage, if you put too much:
1) it will be obvious you have way too much makeup on and you'll look like a cake (beats the whole propose of Bare Mineral makeup).
2) your makeup won't last all day.
3) you'll run out sooner and have to buy more - BareMinerals is pricey so you don't want to be doing that.
.jpeg) |
| Prime Time |
Step 1: before applying any makeup at all you want your face to be moisturized, then you apply Prime Time. Let this set before applying your makeup. This is a face Primer that will help keep your makeup on and in place all day long.
 |
| Step2 & 3: Fairly Light |
Step 2: applying your foundation. I bought the Light Starter kit and it came with Light and Fairly Light. Right now I use Fairly Light, but in January/February I will probably have to use Light since we don't get much sun at all in winter :(
Open the slot and pour a little amount into the lid as shown in the picture. Most of you will be thinking: is that all? Yes that is all, trust me it does the job great!
 |
| This is all you need |
Step 3: now this is the fun part, your going to stick to this number one beauty rule: SWIRL, TAP AND BUFF. I call it STB! You swirl to get the minerals working and attached to the brush, you're going to tap the brush to get the excess off the sides and you're going to buff onto your face. The powder doesn't go all powder like on but more creamy like and it feels very light on your face, as if you weren't wearing any makeup at all! Do this about 2-4 times on each cheek following up on the chine then on the forehead depending on how much coverage you want. I do it 3 times sometimes 4. If you're in a hurry, instead of applying the makeup on in 3 different sections (right cheek - left cheek - forehead) you can go on and do both cheeks quickly and the forehead - does the job just fine.
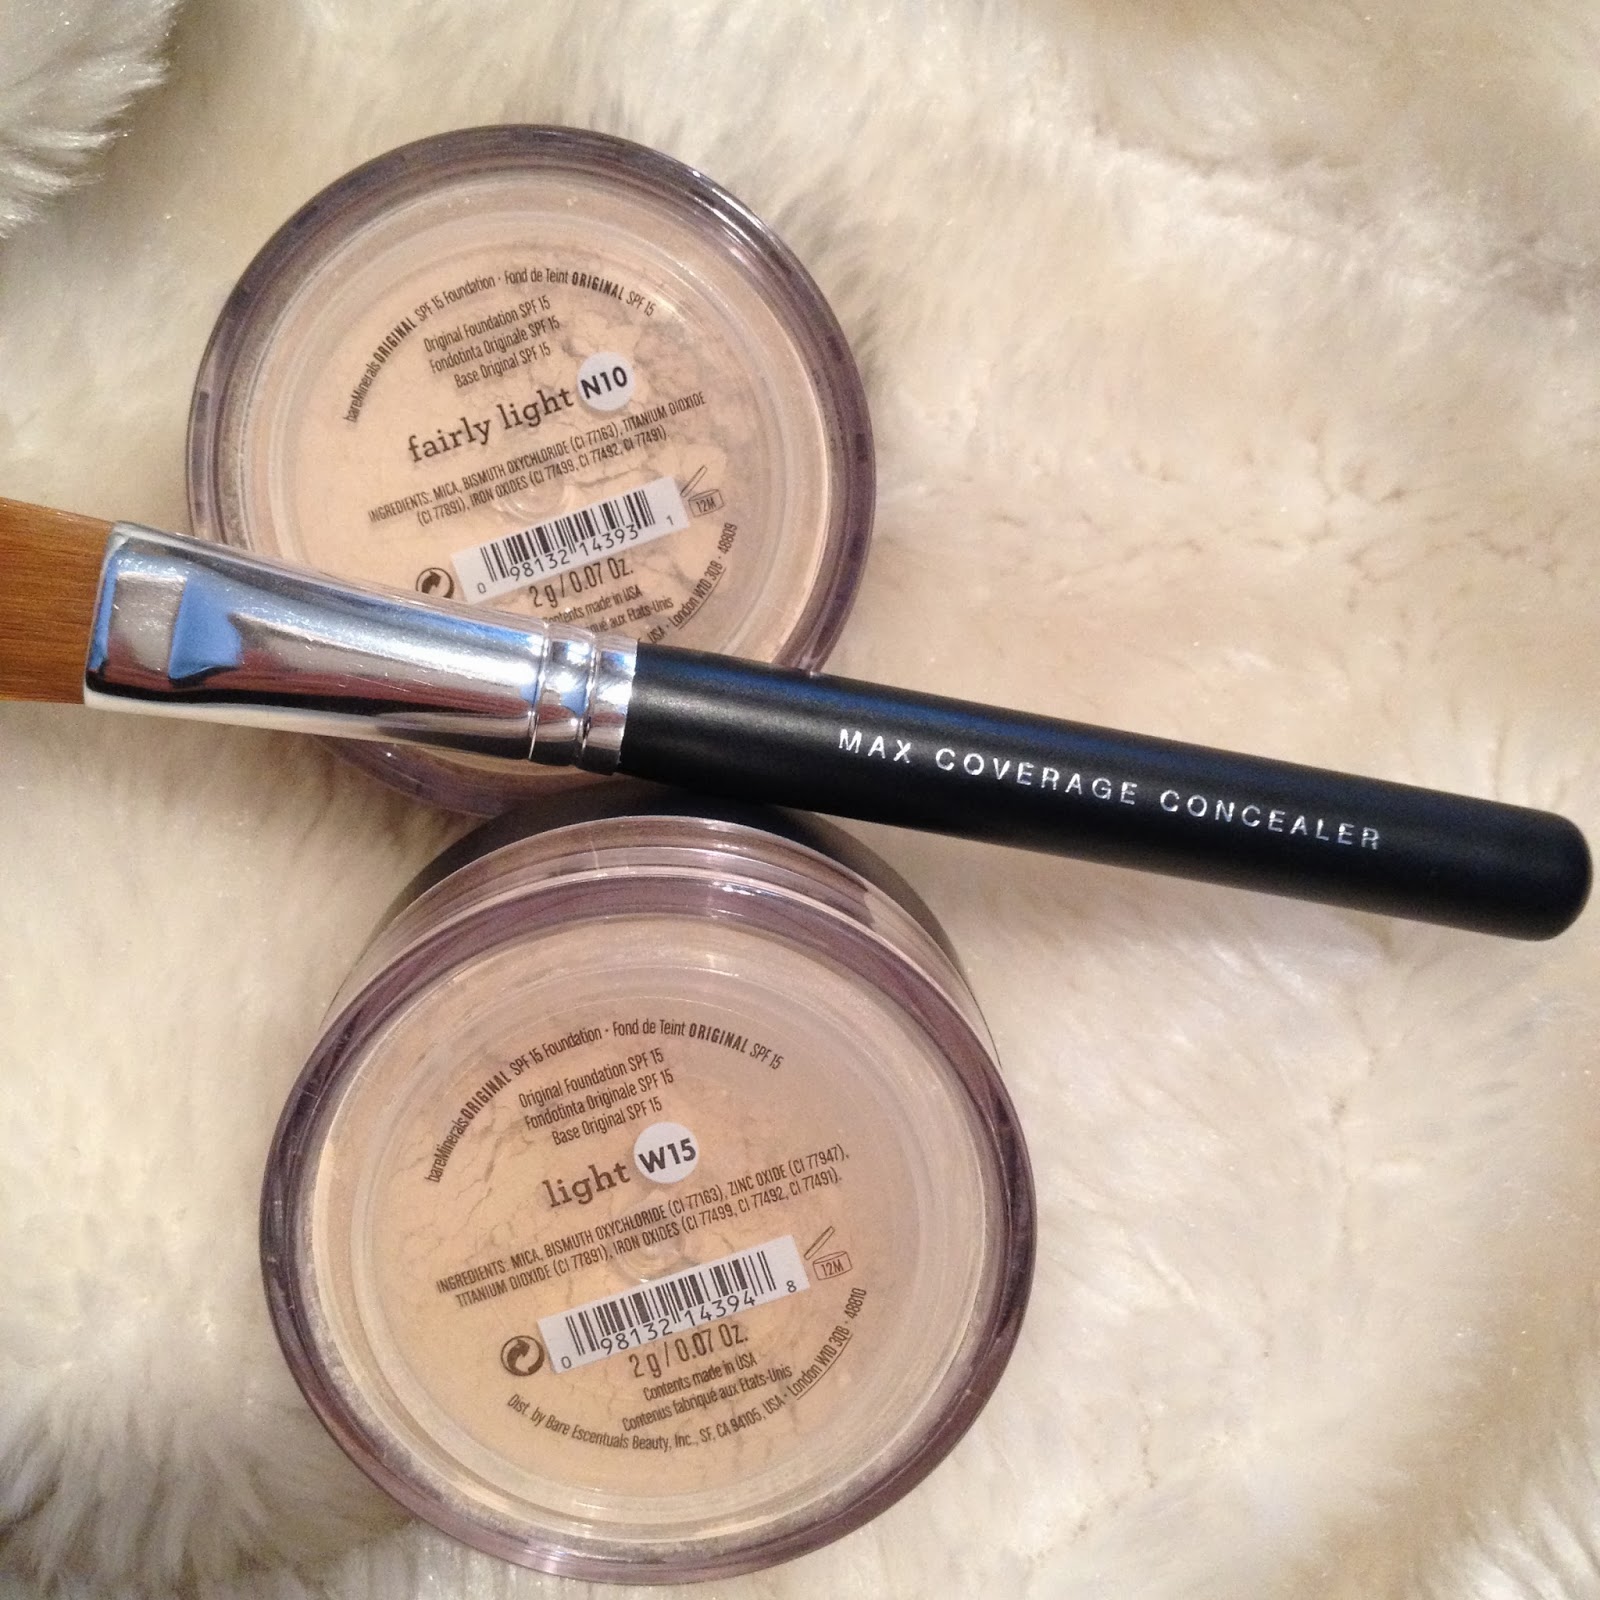 |
| Max coverage |
Now for this process you can either use the Flawless Face brush or the Full Flawless Face brush. I personally find the Full Flawless Face brush the best option at this stage. For more coverage you can then use the Max Coverage Concealer brush. I use this around the nose where it's harder to get in with the big brush, under the eyes and on any spots and blemishes I would like better and fuller coverage.
.jpeg) |
| Step 4: Warmth |
Step 4: take Warmth and apply a very small amount in the lid again proceeding with the STB rule. You can either apply this over your cheek bones and nose for a nice glow, or use it as a contour. I use this as a contour to define my face and give it more color and definition. For this step I use the Flawless face brush, this gives I lighter application :). Remember not to put too much or you'll look like an "Oompa Loompa."
 |
| Step 5: Original Mineral Veil |
Step 5: Mineral Veil. This is the finishing touch everyone one needs and loves! Again using the STB rule and this time you apply this evenly all over your face for a beautiful finishing touch. This will cover up your pores, give you a less shine and set your makeup in place for the whole day. For this step I use the Full Flawless Face brush.
And voila, your skin looks flawless and beautiful!
There's just one more important thing you should know, I've read a few reviews and I've had friends say that the makeup really itches once they've applied it. This is because the oxidants in the minerals has a reaction to your skin causing it to itch, in this case I suggest you stop using BareMinerals, go to your beauty store and ask for advice. They might recommend another product which might be a bummer if you loved BareMinerals but you definitely don't wont to ruin your beautiful face. If your skin itches it means it's not ok with this product and is telling you to stop. Skin care is very important and for a great makeup application you need nice cared after skin.
If you have any questions leave them in the comments below or send them privately by email here :)
xoxo Cycybeauty ❤
<a href="http://www.bloglovin.com/blog/11403225/?claim=ym6wxtcr57p">Follow my blog with Bloglovin</a>

No comments:
Post a Comment